ULTRASONIC INSPECTION

ULTRASONIC INSPECTION

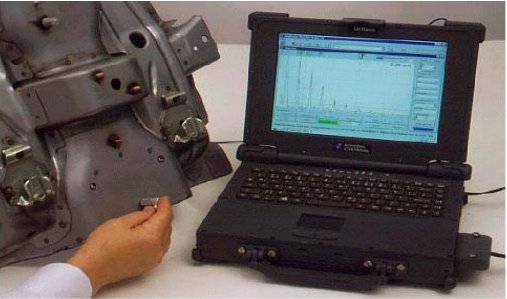
This ultrasonic inspection method (ultrasonic testing) is known as (non-destructive testing), to detect discontinuities in the material to be examined, the propagation of high-frequency (0.1-20 MHZ) sound waves produced by the ultrasonic inspection probe and reflection on the probe after impinging on discontinuity and so it is based on detection by the probe. The structure of a typical ultrasonic probe is shown in Figure 1. Waves perceived by the probe (with piezoelectric effect) are converted into electrical signals and appear as echoes (echoes), which are precursors to the internal structure of the cathode rays tube screen. The locations and amplitudes of the echoes observed on the screen give information about the location and dimensions of the discontinuity.

Ultrasonic testing can be used to detect expected volumetric errors and crack-type surface faults in metallic or non-metallic materials. Discontinuities are best perceived as they are perpendicular to the ultrasonic beam, and ultrasonic method is difficult to apply for coarse-grained structures, especially for austenitic materials. The high frequency sound waves sent into the material are reflected in the event of an impact on the sound path. Depending on the angle of impact, the reflected signal may or may not come to the receiving probe. The reflected signal reaching the receiving probe creates an echo indication on the screen of the ultrasonic inspection device. The coordinates of the reflector within the inspection part can be calculated according to the position of the echo. In addition, the height of the echo gives an idea of the size of the reflector. It may also be possible to make a comment about the type of reflector by looking at the shape of the echo signal.

Accurate evaluation becomes difficult if the sound velocity and sound attenuation characteristics of the inspection part show strong regional changes. In materials where sound attenuation is too great due to coarse grain structure or absorption, inspection may sometimes be impossible. For ultrasonic testing, a sufficiently large surface should be prepared in an accessible state. Surface condition directly affects inspection parameters. Inspection of thin parts is relatively difficult. It is not possible to detect planar discontinuities positioned parallel to the axis of the sound beam. Generally, reference standard blocks are needed. These blocks are collectively seen in Figure 5. High frequency sound waves are produced by a piezoelectric crystal in a piece called the probe. The frequency range used in the ultrasonic examination of metallic materials can be between 500 kHz and 10 MHz. The appropriate frequency is determined according to the microstructure characteristics of the inspection part. When the probe is in contact with the test surface, a suitable contact fluid (oil, grease, water, etc.) must be used in order for the sound waves to penetrate into the material (senses cannot spread in the space). By analyzing the probe on the inspection surface, the positions and heights of the echoes arising from the part geometry are evaluated and error analysis is performed. The most commonly used wave types for ultrasonic inspection are longitudinal (pressure) and transverse (shear) waves. When working with probes with zero degrees of input angle, called normal probes, the waves that travel through the material are longitudinal waves. Angled probes send transverse waves into the material, usually at 45 °, 60 ° and 70 ° (these values are for steel material).

General Standards

EN ISO 16810 - Non-destructive testing - Ultrasonic inspection: General rules
EN ISO 16811 - Non-destructive testing - Ultrasonic inspection: Sensitivity and range adjustment
EN ISO 16823 - Non-destructive testing - Ultrasonic inspection: Transition technique
EN ISO 16826 - Non-destructive testing - Ultrasonic inspection: For inspection of discontinuities perpendicular to the surface
EN ISO 16827 - Non-destructive testing - Ultrasonic inspection: Characterization and sizing of defects
EN ISO 16828 - Non-destructive testing - Ultrasonic inspection - Flight / transition time diffraction technique (TOFD) as a method for determining and measuring discontinuities
EN 12668-1 - Non-destructive testing - Characterization and verification of ultrasonic inspection equipment - Part 1: Devices
EN 12668-2 - Non-destructive testing - Characterization and verification of ultrasonic inspection equipment - Part 2: Probes
EN 12668-3 - Non-destructive testing - Characterization and verification of ultrasonic inspection equipment - Part 3: Combined equipment
EN ISO 2400 - Non-destructive testing - Ultrasonic inspection - Features for calibration block No.1
EN ISO 7963 - Non-destructive testing - Ultrasonic inspection - Features for calibration block No.2
EN ISO 1330-4 - Non-destructive testing - Terminology - Part 4: Terms used in Ultrasonic Inspection